This is to help you create dynamic field remarks based on the selected option / answer in a question.
Here is a video showing step-by-step instructions on how to do that.
{% video_player “embed_player” overrideable=False, type=’hsvideo2′, hide_playlist=True, viral_sharing=False, embed_button=False, autoplay=False, hidden_controls=False, loop=False, muted=False, full_width=False, width=’688′, height=’387′, player_id=’167058770545′, style=” %}
Step 1: Create a section that has the question and remarks.
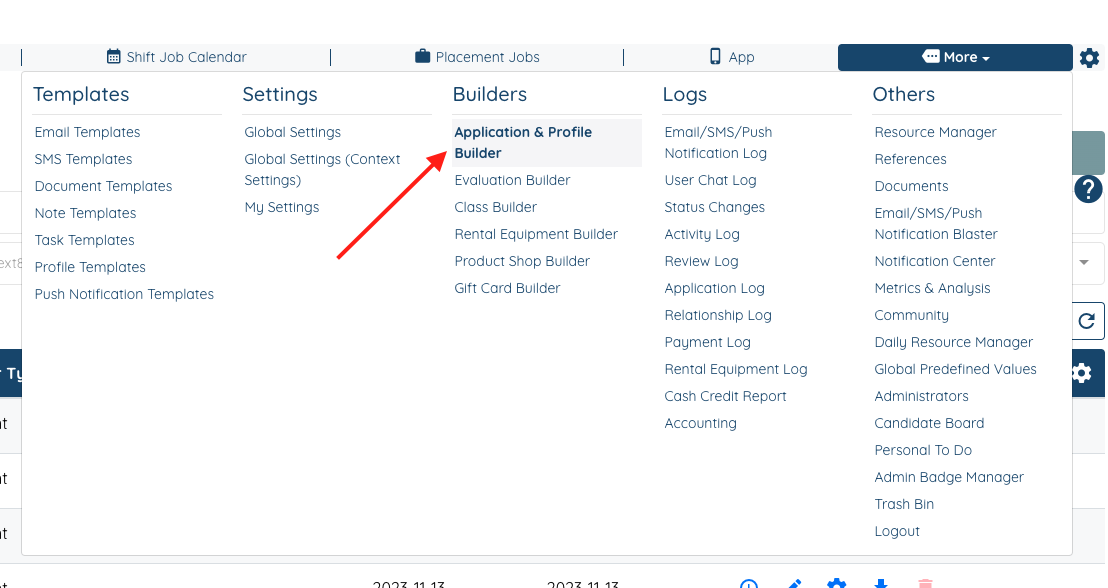
Go to More > Builders > Application & Profile Builder
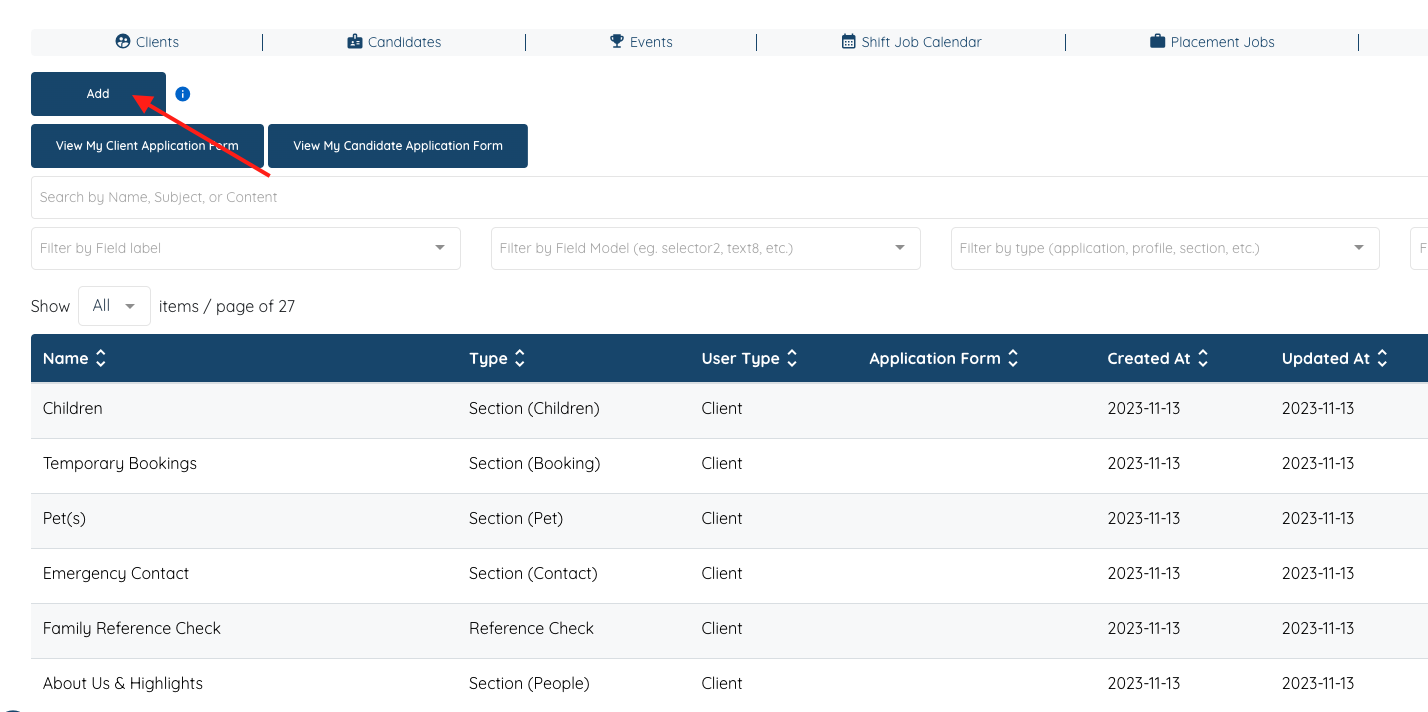
Click the ‘Add’ button to add a new builder.
Add a name to the builder (i.e Favorite Ice cream flavor), and select the builder type ‘Section‘, and the user type depends on where you want to show this section.
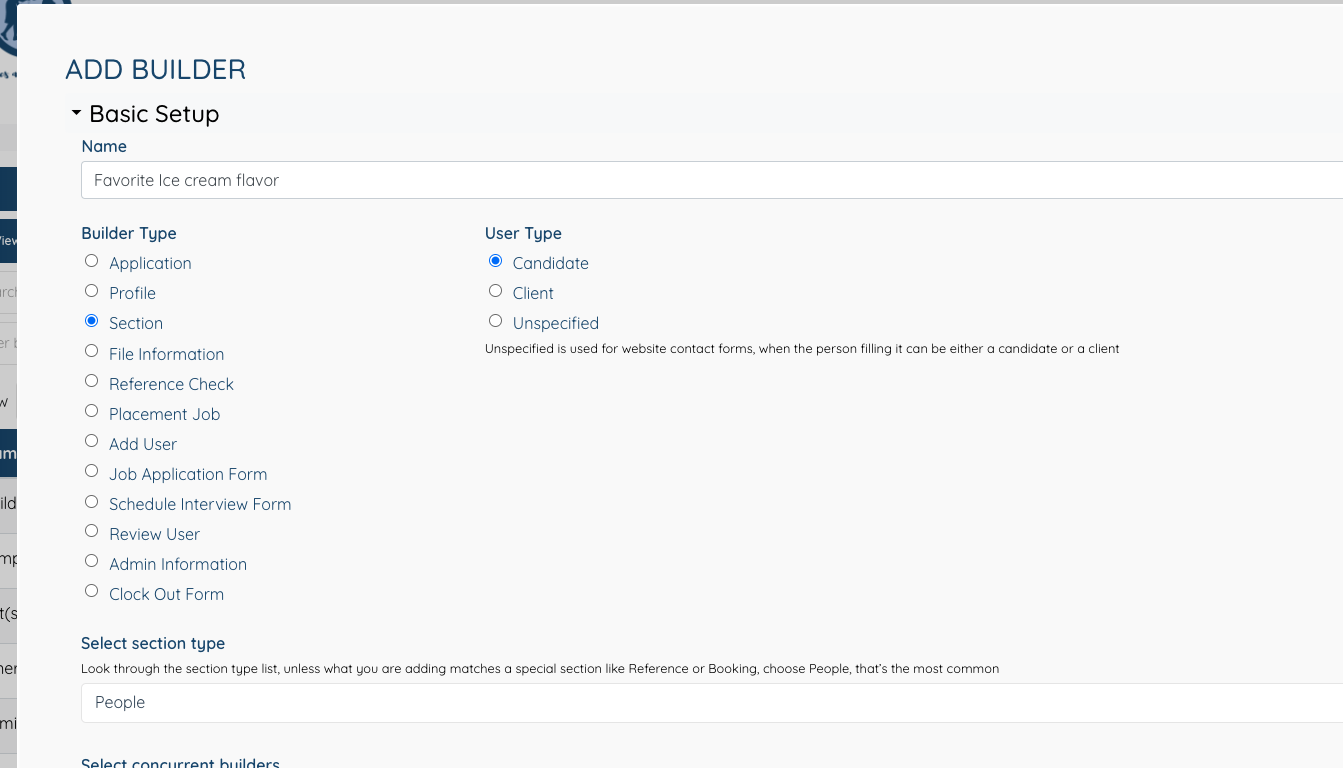
It’s very important that you select the section type ‘People‘.
Start by adding a new question field
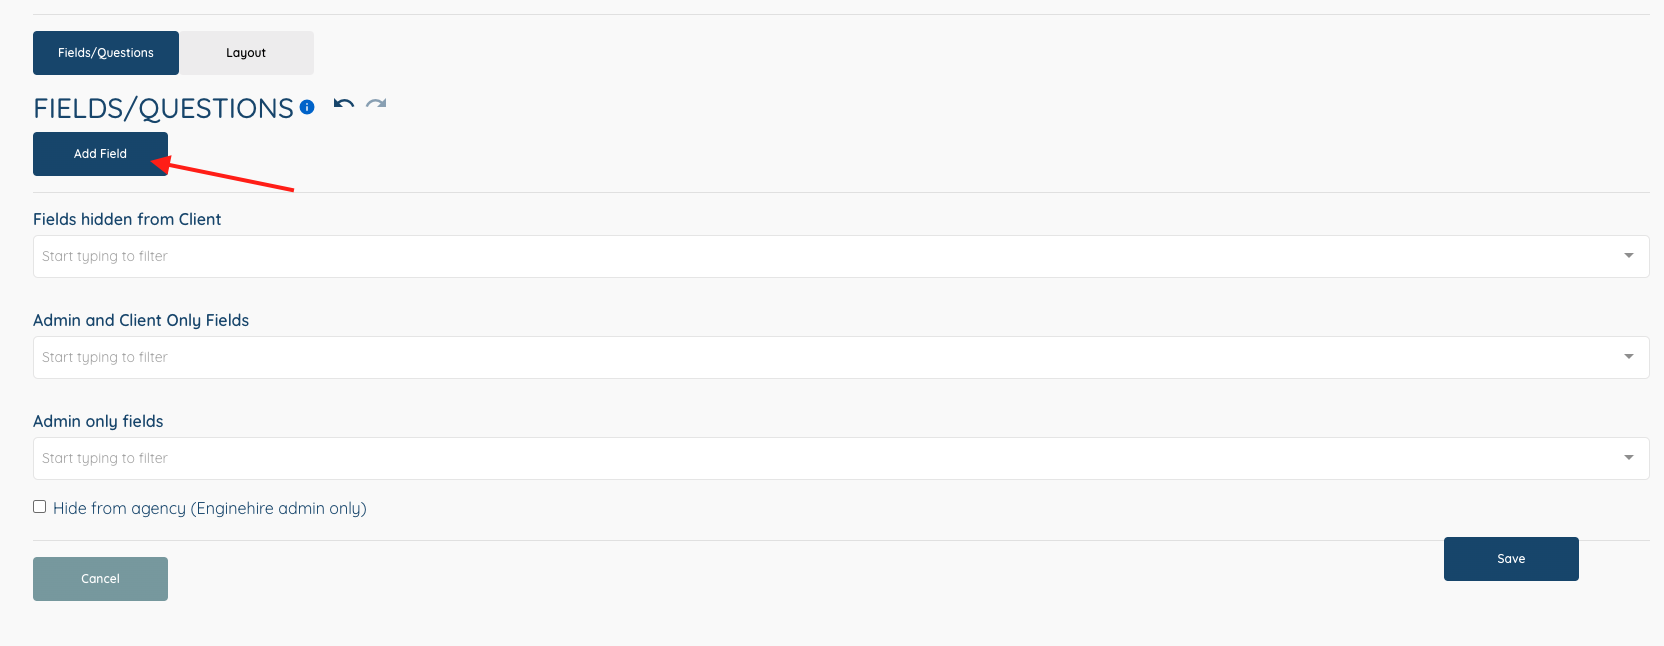
In the video, we used the question/field type ‘Check box group’ but now we’ll use ‘Radio‘, and we’ll add the options to the question.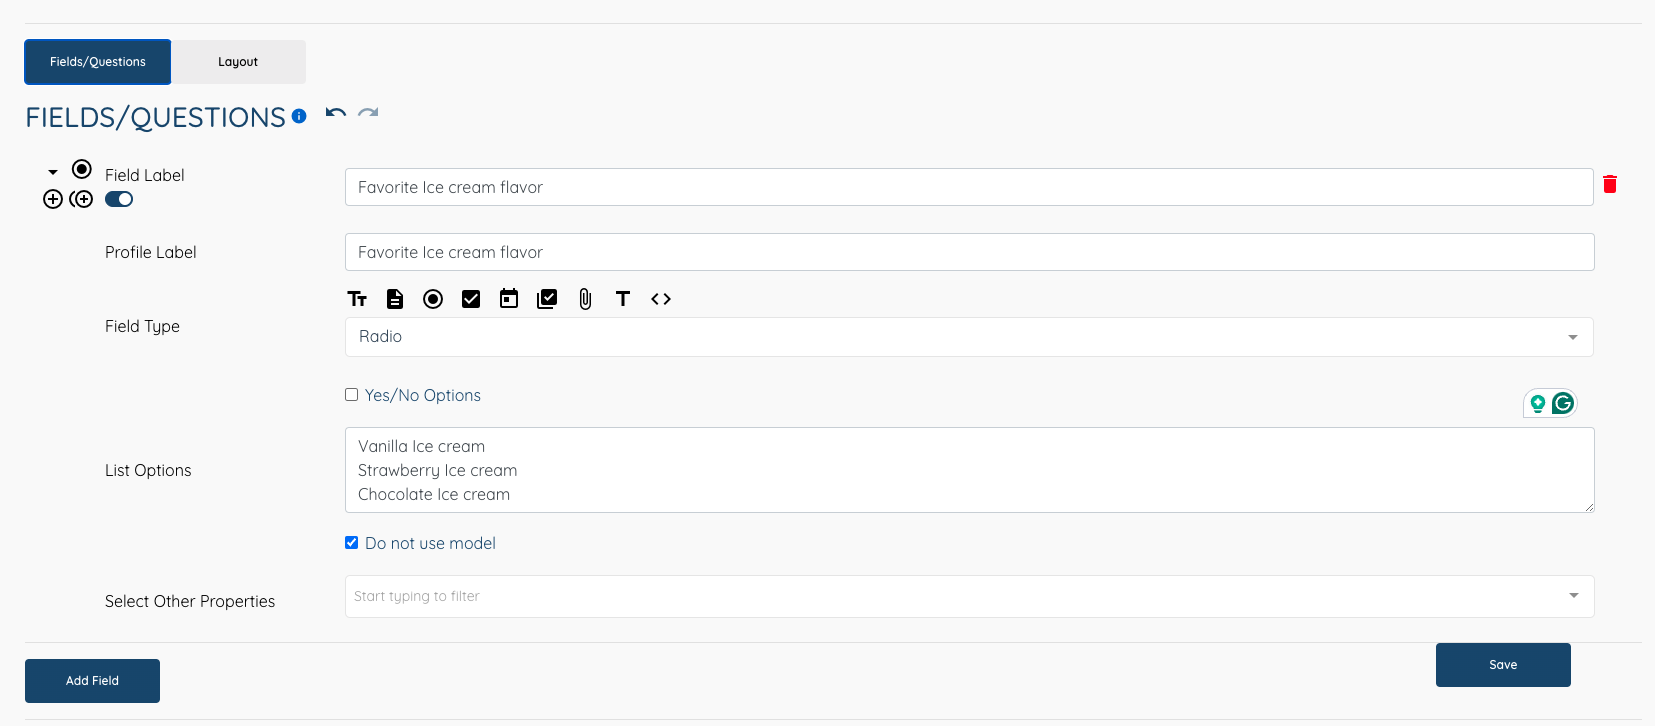
Now we want to add the field remarks and make them dynamic (conditioned by the answer selected from the previous question).
Each selection needs to have its own remark field.
For the label you can use any text you want.
Make sure to select the Field Type ‘HTML‘
Select the property ‘Show Condition’ and then make the condition to show if the answer to the selected question is the option you want to show the remark for.
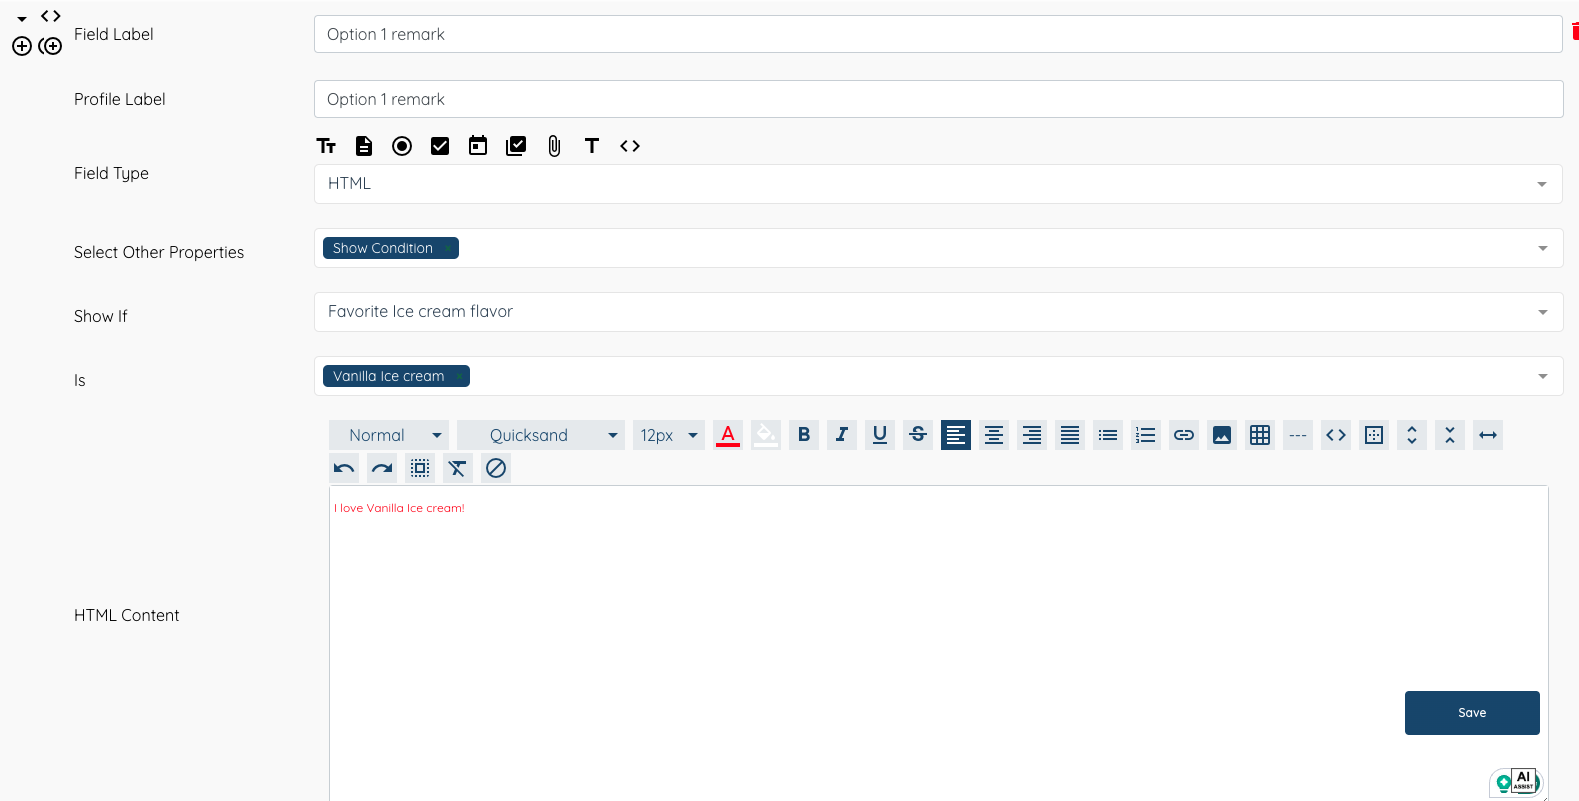
Repeat the process for the other options while making the necessary changes to the fields.
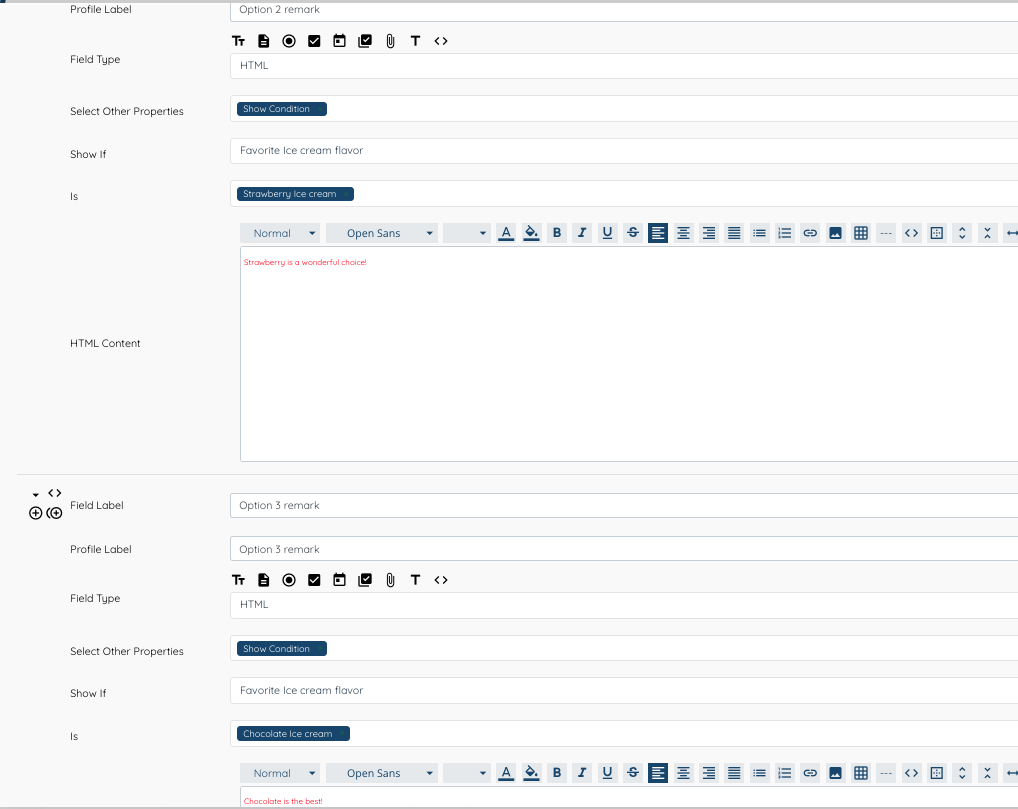
Save your changes.
Step 2: Add the section to a profile or an application.
Go to the “Application & Profile Builder” and find the builder/application/profile you want to add your created section in, and click the ‘pencil‘ icon next to it.
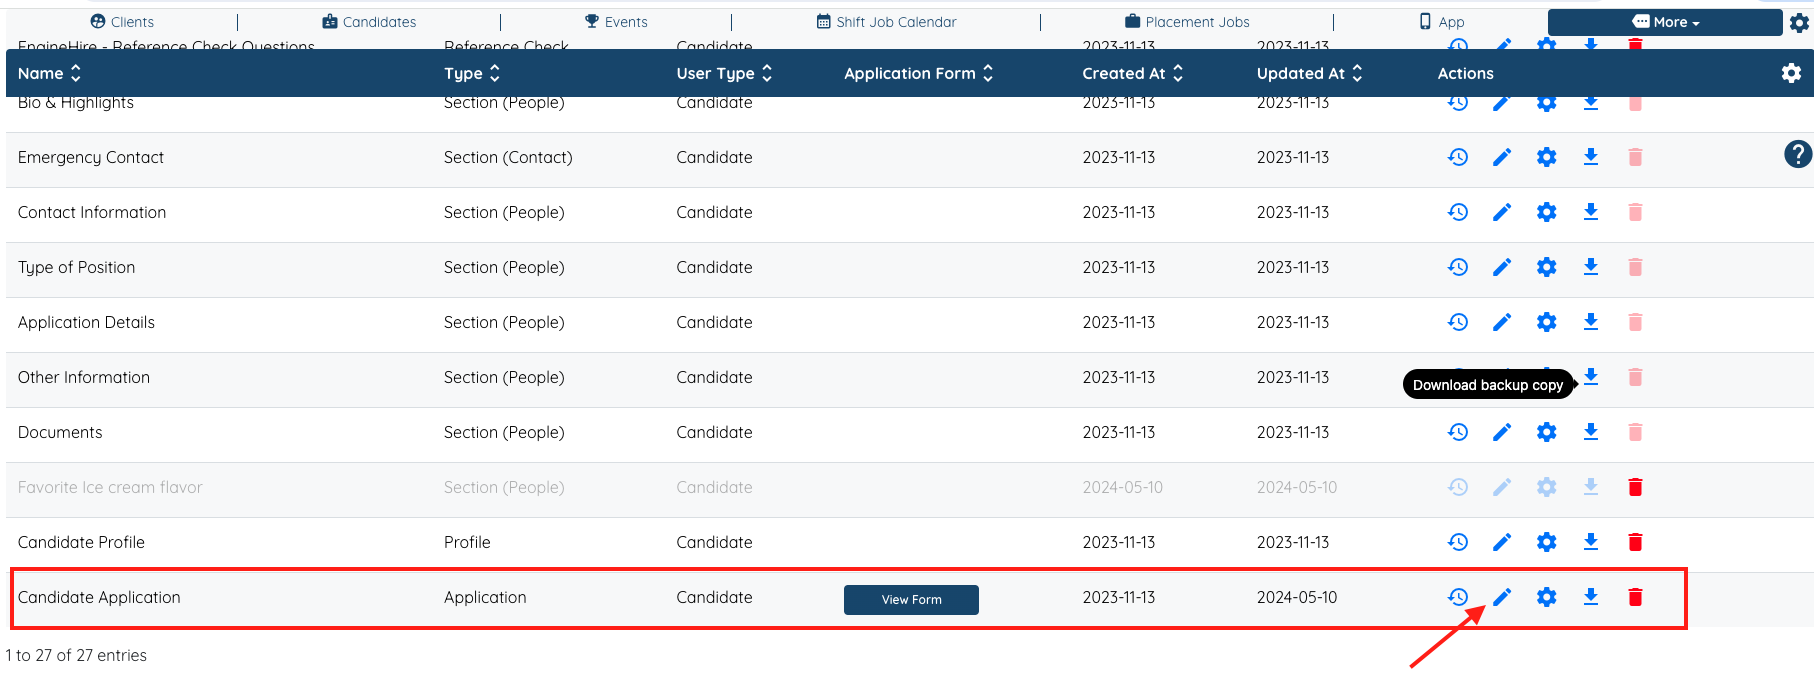
Scroll down and click ‘Add Field’
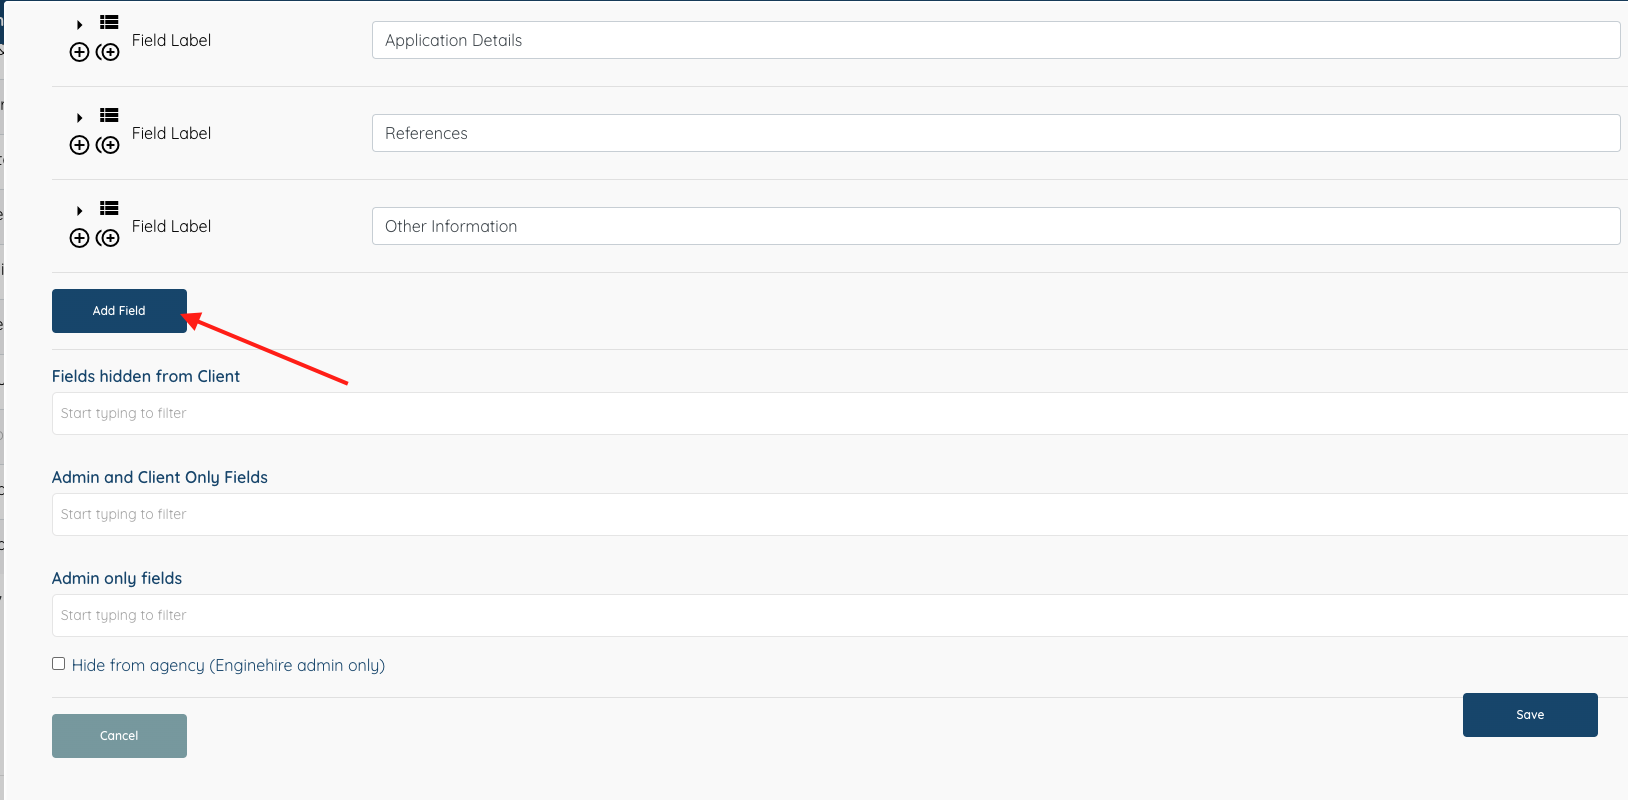
Add a name to the field (label), and select the field type ‘Section‘. Then select the section you created in Step 1.
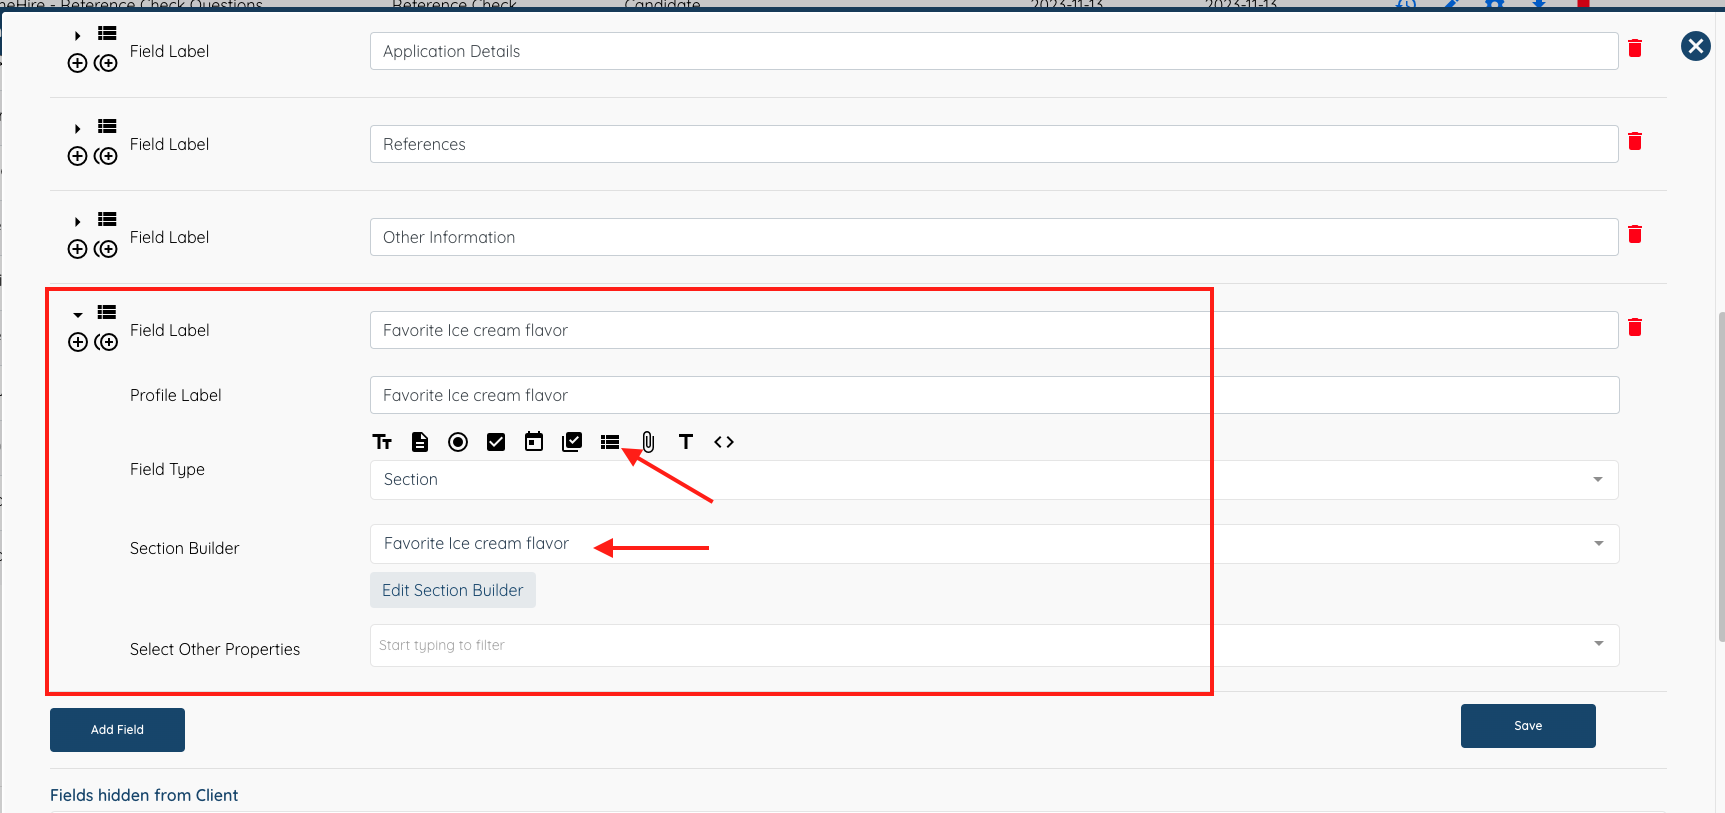
Save.
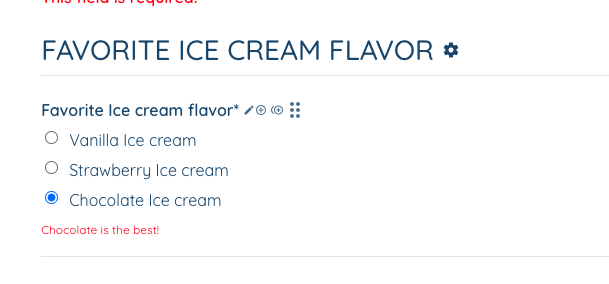
Now if you go to the application, you should see the section you created with the questions and the dynamic remarks!
If it doesn’t work the first time, go back to the section builder, then scroll to see if the show condition is mapped correctly.
i.e here they were removed so had to re-add them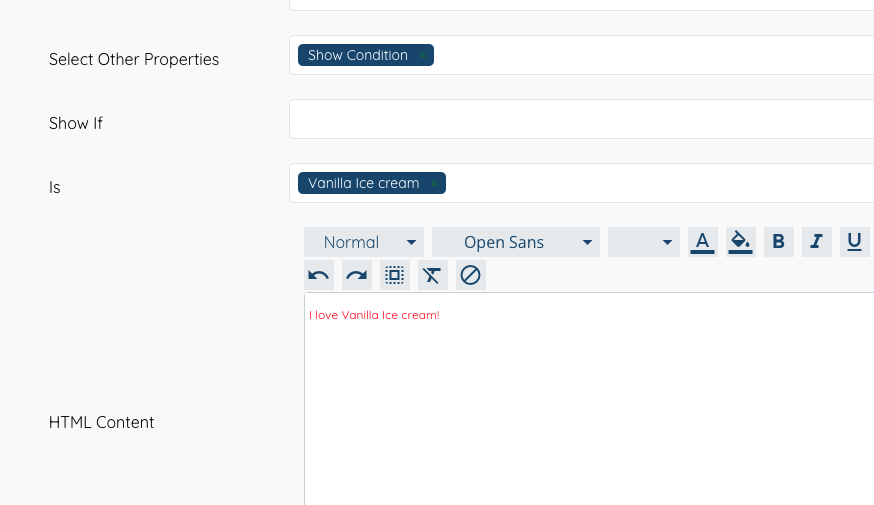
Now it’s your turn!